Do it yourself.
This is a very vague acronym, but according to Wikipedia, it is "a term used to describe the building, modifying, or repairing of something without the aid of experts or professionals". Does is still count if what you do yourself has under no circumstance and would never require the aid of an expert or a professional? If so, I do a lot of D.I.Y.-ing...
For example, one of the first things I do every morning after waking up is build a smoothie using ingredients I put together and blend myself. Or, I might even modify a bagel with some cream cheese, or bacon and an egg in the middle and build a bagel sandwich, myself.
But, I'm just being ridiculous... Let me tell you about what D.I.Y. project I actually did today:)
Being unemployed and on winter break from school has provided me many, many hours to myself in which I have done lots of fun things. The holidays are always a happy time for me because I spend extra time with my family, not spending hours on end at school allows me to hangout with my 3 pups all day, and Daniel has a few additional days off for Christamas Eve, Christmas and New Year's Day. While I am totally loving all this time off to spend with loved ones, I am also spending A LOT more time at home... by myself... with nothing to do... Everyone I know works, has kids, has a life, while I do not. So now, with the time I have left to do nothing dwindling (next semester at school begins in 7 days), I've been going crazier than ever with cleaning, cleaning, cleaning, organizing, and really trying to whip our home into shape!
We've lived in our house for a little over 2 years now. Our hectic work and school schedules coupled with of our tendency to hoard and our pack rat characteristics have inhibited us from truly settling in completely or from finding a proper place for all of our belongings. Making things feel homey, if you will. When I spend so much time at home, these things I already know become even more apparent, and lately we've been having pretty serious thoughts of moving to Europe in a few years, so I think it is definitely time to settle in here before it's too late to get all of the enjoyment that we possibly can out of our first home together.
Sooo, all of this is to say that today I etched the shit out of some glass!
Previously unbeknownst to me, etching designs into glass and mirrors is very easy. Martha Stewart taught me this from a craft book I have of hers, and I was excited to try it on a vintage mirror Daniel's parents gave to us last year and some glass bottles I've been saving (hoarding) for no reason in particular (aside from hopes that I would one day find a use for them). And I did! I (Daniel) will hang the mirror in our room tomorrow and one of the pictures further down shows how I displayed the glass bottles. These are the little touches I love so much that make our house a home!
I began at Hobby Lobby to pick up my supplies. I already had the objects I wanted to etch, paper towels, Windex, a pencil and a paint brush, but I had to get everything else: etching cream, protective gloves, stencils, self-adhesive shelf liner, and an exact-o knife. The total was somewhere around $30 (the etching cream is $10 for a small bottle). Gather all supplies and use a drop cloth to protect any furniture as the etching cream is damaging to that as well as your skin, eyes, and respiratory tract (yikes!). Now, get to work! (I would have taken more detailed step-by-step pictures, but I was too afraid of getting the etching cream everywhere, so I wore the gloves most of the time)
 |
| Supplies! Clean all surfaces and follow directions on the etching cream bottle |
 |
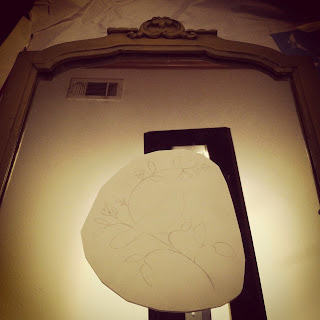
| Trace design onto shelf liner first |
 |
| Adhere shelf liner in desired position on mirror |
 |
| Use an exact-o knife to cut the design through the shelf liner |
 |
| Apply etching cream according to directions on bottle to cut-outs in design |
 |
| Follow directions for etching cream removal and peel off shelf adhesive. Voila! Etched bird prettiness:) |
 |
| Follow same steps with glass bottles! |
 |
| "L" of "LOVE" |
 |
| "E" of "LOVE" |
 |
| What I used my etched glass bottles for |
 |
| Ta Da! |
And I did it all myself.
Til next time...
Take Care.

No comments:
Post a Comment